
Blog
Last Updated: September 24, 2026
Preventing installation errors in structural steel starts long before the crane arrives, with preparation, paperwork, and a clear plan. Steel erection is unforgiving: a beam 10 mm off at the base can be a metre out at the top, so the best crews plan as much as they build.
Anchor bolt misalignment is the single most common cause of steel erection delays. Check bolt placement and concrete strength before any steel leaves the ground. Concrete must reach its specified design strength, a percentage of the 28-day strength set by the engineer of record, and curing time depends on mix design, weather, and pour thickness, so plan around cold or wet seasons.
Precision measurement tools turn guesswork into data. Laser levels, theodolites, and total stations give you numbers you can trust and record.

Use the right tool for each job:
Most field problems start as detailing errors, and catching them in the shop is far cheaper than fixing them in the air. What separates a smooth erection from a costly one is whether errors are caught before a single piece is cut.
Common structural steel detailing mistakes include:
A coordinated BIM model is a single federated model where structural steel, mechanical ductwork, plumbing, and electrical conduit all live in the same coordinate space. Clash detection compares the bounding geometry of each element against every other, flagging intersections above a set tolerance: a duct main through a beam web is a hard clash, a conduit clearing a beam by half an inch is a clearance clash.
A practical sequence that most experienced detailing teams follow:
A digital twin takes the coordinated model further. Updated with as-built data, survey points, bolt torque logs, weld inspection results, it reflects what is actually standing, so when a column comes in out of plumb by a quarter inch, the engineer can check whether it affects the connection design before the next floor goes up. This is not a replacement for field measurement; a twin never updated with as-built data is just a design model with a more expensive name.
BIM coordination is not free. It requires a detailer who can model, not just draft; a schedule that gives MEP trades time to model their systems before steel is released for fabrication; and a contract naming someone, usually the GC or construction manager, in charge of the federated model. Coming from paper drawings, expect a learning curve of a few projects, but the payoff is real: fewer RFIs, less rework, and an erection sequence that does not stop every time a beam will not fit past a duct.
Pro Tip Ask your detailer for the clash report, not just the model. A model without a dated clash report is a drawing. The report is the proof that coordination actually happened.
OSHA steel erection standards set the minimum safety and structural rules for every steel job. Following them is not optional, and not just about avoiding fines.
The OSHA steel erection standards cover key areas:
Request A Quote →
A steel fabrication quality control checklist catches defects before steel ships, once a beam is in the air, every fix costs ten times more. But the checklist is only half the job; the other half is verifying the work after installation.
Use this at the fabricator before anything leaves the yard:

Pro Tip Photograph each piece before it ships, with the piece mark visible. If a fit problem shows up on site, you have a record of the piece as it left the shop. This settles disputes fast and protects both the fabricator and the erector.
A shop checklist confirms the steel left the yard correct; it says nothing about whether it was installed correct. Run this protocol after erection and before the next trade starts:

| Stage | Check | Who Verifies | When |
|---|---|---|---|
| Anchor bolts | Placement, projection, plumb | Surveyor | Before erection |
| Concrete | Curing and design strength | Engineer | Before erection |
| Measurement | Calibration and readings | Site engineer | During erection |
| Detailing | Clash and dimension check | Detailer | Before fabrication |
| Fabrication | QC checklist signed | Shop inspector | Before shipping |
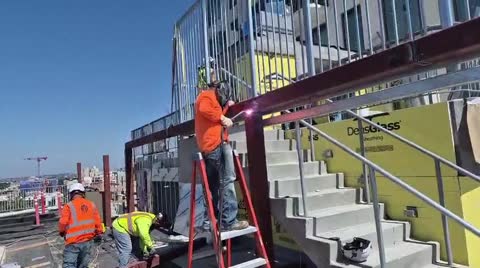
| Welding | Visual and NDT checks | Certified inspector | During erection |
| Post-install | Plumb, elevation, torque | Surveyor | After erection |
Watch Out Skipping post-installation verification is the mistake that hides everything else. A frame that looks fine on the outside can be out of plumb by more than tolerance. That error shows up later as cracked finishes, sticking doors, and failed inspections. By then, the fix costs far more than the survey would have.
A checklist signed at the end of the week is theater. A checklist that works is one where the inspector stops the line when a box cannot be checked, give the inspector authority to hold a piece and the crew a clear path to resolve the hold.
Welding defects and connection failures are the most serious installation errors in structural steel, affecting load-bearing capacity and leading to buckling or fatigue over time.
Watch for these defects:

Post-installation verification confirms the frame is built as designed, the last line of defense against installation errors in structural steel.
Run a final survey after erection:

| Step | Check | Who Verifies | When |
|---|---|---|---|
| Anchor bolts | Placement, projection, plumb | Surveyor | Before erection |
| Concrete | Curing and design strength | Engineer | Before erection |
| Measurement | Calibration and readings | Site engineer | During erection |
| Detailing | Clash and dimension check | Detailer | Before fabrication |
| Fabrication | QC checklist signed | Shop inspector | Before shipping |
| Welding | Visual and NDT checks | Certified inspector | During erection |
| Post-install | Plumb, elevation, torque | Surveyor | After erection |
The most frequent installation errors in structural steel include anchor bolt misalignment, dimensional inaccuracies from fabrication, welding defects, and improper bolt tensioning. Detailing mistakes such as missing stiffeners or incorrect connection design also cause field problems. These issues often stem from misread structural drawings, lack of site inspection, or skipping quality control steps. Catching them early through laser levels, theodolites, and pre-erection surveys prevents rework and protects structural integrity.
OSHA steel erection standards (29 CFR 1926 Subpart R) set requirements for anchor bolt placement, fall protection, crane operations, and connection procedures. Following these standards reduces the risk of collapse, buckling, and worker injury. For example, OSHA requires that anchor bolts be inspected before erection and that structural connections be complete before loads are applied. Complying with OSHA steel erection standards is not just legal; it is a core part of preventing installation errors on any job site.
A steel fabrication quality control checklist ensures every fabricated member meets dimensional accuracy, weld quality, and coating requirements before shipping. It typically covers material verification, cut and hole tolerances, weld inspections, and surface preparation. Using a checklist catches detailing mistakes and fabrication defects at the shop, avoiding costly field fixes. For commercial projects, a documented QC process also provides traceability and supports OSHA compliance during installation.
Connection failures during installation often result from misaligned holes, incorrect bolt torque, or missing welds. Buckling and fatigue can occur if temporary bracing is removed too early or if the erection sequence is wrong. Corrosion from improper storage also weakens connections. Using precision measurement tools, following the engineer's erection sequence, and conducting post-installation verification are key to preventing these failures and maintaining structural integrity.
Request A Quote
Call Us
(619) 241-2413E-mail Us
info@antoniosmetalworks.com


